Using Atomic, Kubernetes, Docker, Flannel and etcd.
The term “Microservice Architecture” has sprung up over the last few years as the way forward for deploying applications. Docker on the other hand has broken the record in how fast it moved from a cool and disruptive technology to a commodity platform, given the addition of tools like Kubernetes orchestration engine and a healthy ecosystem of supporting open-source projects.
How important is this? Well consider Google is running all of their services in containers for several years now, something to the tune of 2 billion containers per day. Need I say more?
A microservices software architecture is as an approach to developing a single application as a suite of small services, each running in its own process and communicating with lightweight mechanisms, often an HTTP resource API. These services are independently deployable and scalable by fully automated deployment machinery and each service provides a firm module boundary with a minimum of centralized management.
You’ve heard enough, and you are so ready to give this architecture a run, right? This article will allow you to build that in a lab environment and will walk you through step-by-step deployment of its various components.
To ensure anyone can try this walkthrough, we’ll be using freely available tools and resources. You will need a web browser and an ssh client to build this powerful microservices architecture on TryStack.org using Fedora 23 and CentOS Atomic Host 7, which is a lightweight operating system that has been assembled out of upstream RPM content and designed to run applications in Docker containers. Amongst other core modules, it includes:
Kubernetes – an open-source platform for automating deployment, scaling, and operations of application containers across clusters of hosts. It orchestrates applications roll out and scale out across most public and private cloud infrastructures.
Docker – an open platform for building, shipping and running distributed applications. It gives programmers, development teams and operations engineers the common toolbox they need to take advantage of the distributed and networked nature of modern applications.
etcd – an open-source distributed key value store that provides shared configuration and service discovery for clusters. etcd runs on each machine in a cluster and gracefully handles master election during network partitions and the loss of the current master. Application containers running on your cluster can read and write data into etcd. Common examples are storing database connection details, cache settings, feature flags, etc.
Flannel – a very simple overlay network that meets Kubernetes requirements where all containers can communicate with all other containers without NAT and all nodes can communicate with all containers (and vice-versa) without NAT, and the IP that a container sees itself as is the same IP that others see it as.
Build Your Cluster
If you don’t have an existing OpenStack environment to use, get a free TryStack.org account. TryStack is a testing only OpenStack sandbox which will allow you to deploy up to 3 instances and provides you with a public floating IP address. WARNING: Your work on TryStack.org will be destroyed in 24 hours.
Generally, unless otherwise specified, leave all fields to their default values.
1- Add images:
Once logged in, under Compute, click Images, Create Image and create the following images from Image Locations below:
Fedora-23
https://download.fedoraproject.org/pub/fedora/linux/releases/23/Cloud/x86_64/Images/Fedora-Cloud-Base-23-20151030.x86_64.qcow2
Alternatively, you can use a later version of Fedora
Centos-Atomic-Host-7
http://cloud.centos.org/centos/7/atomic/images/CentOS-Atomic-Host-7-GenericCloud.qcow2
Alternatively, you can use a later version of CentOS Atomic Host
2- Create a Security Group
Click Access & Security then Create Security Group. Give it a name and click Manage Rules then Add Rules to open TCP ports 22, 2379, 4001, 5000, 8080, 9090 ingress.

3- Create Network and Router
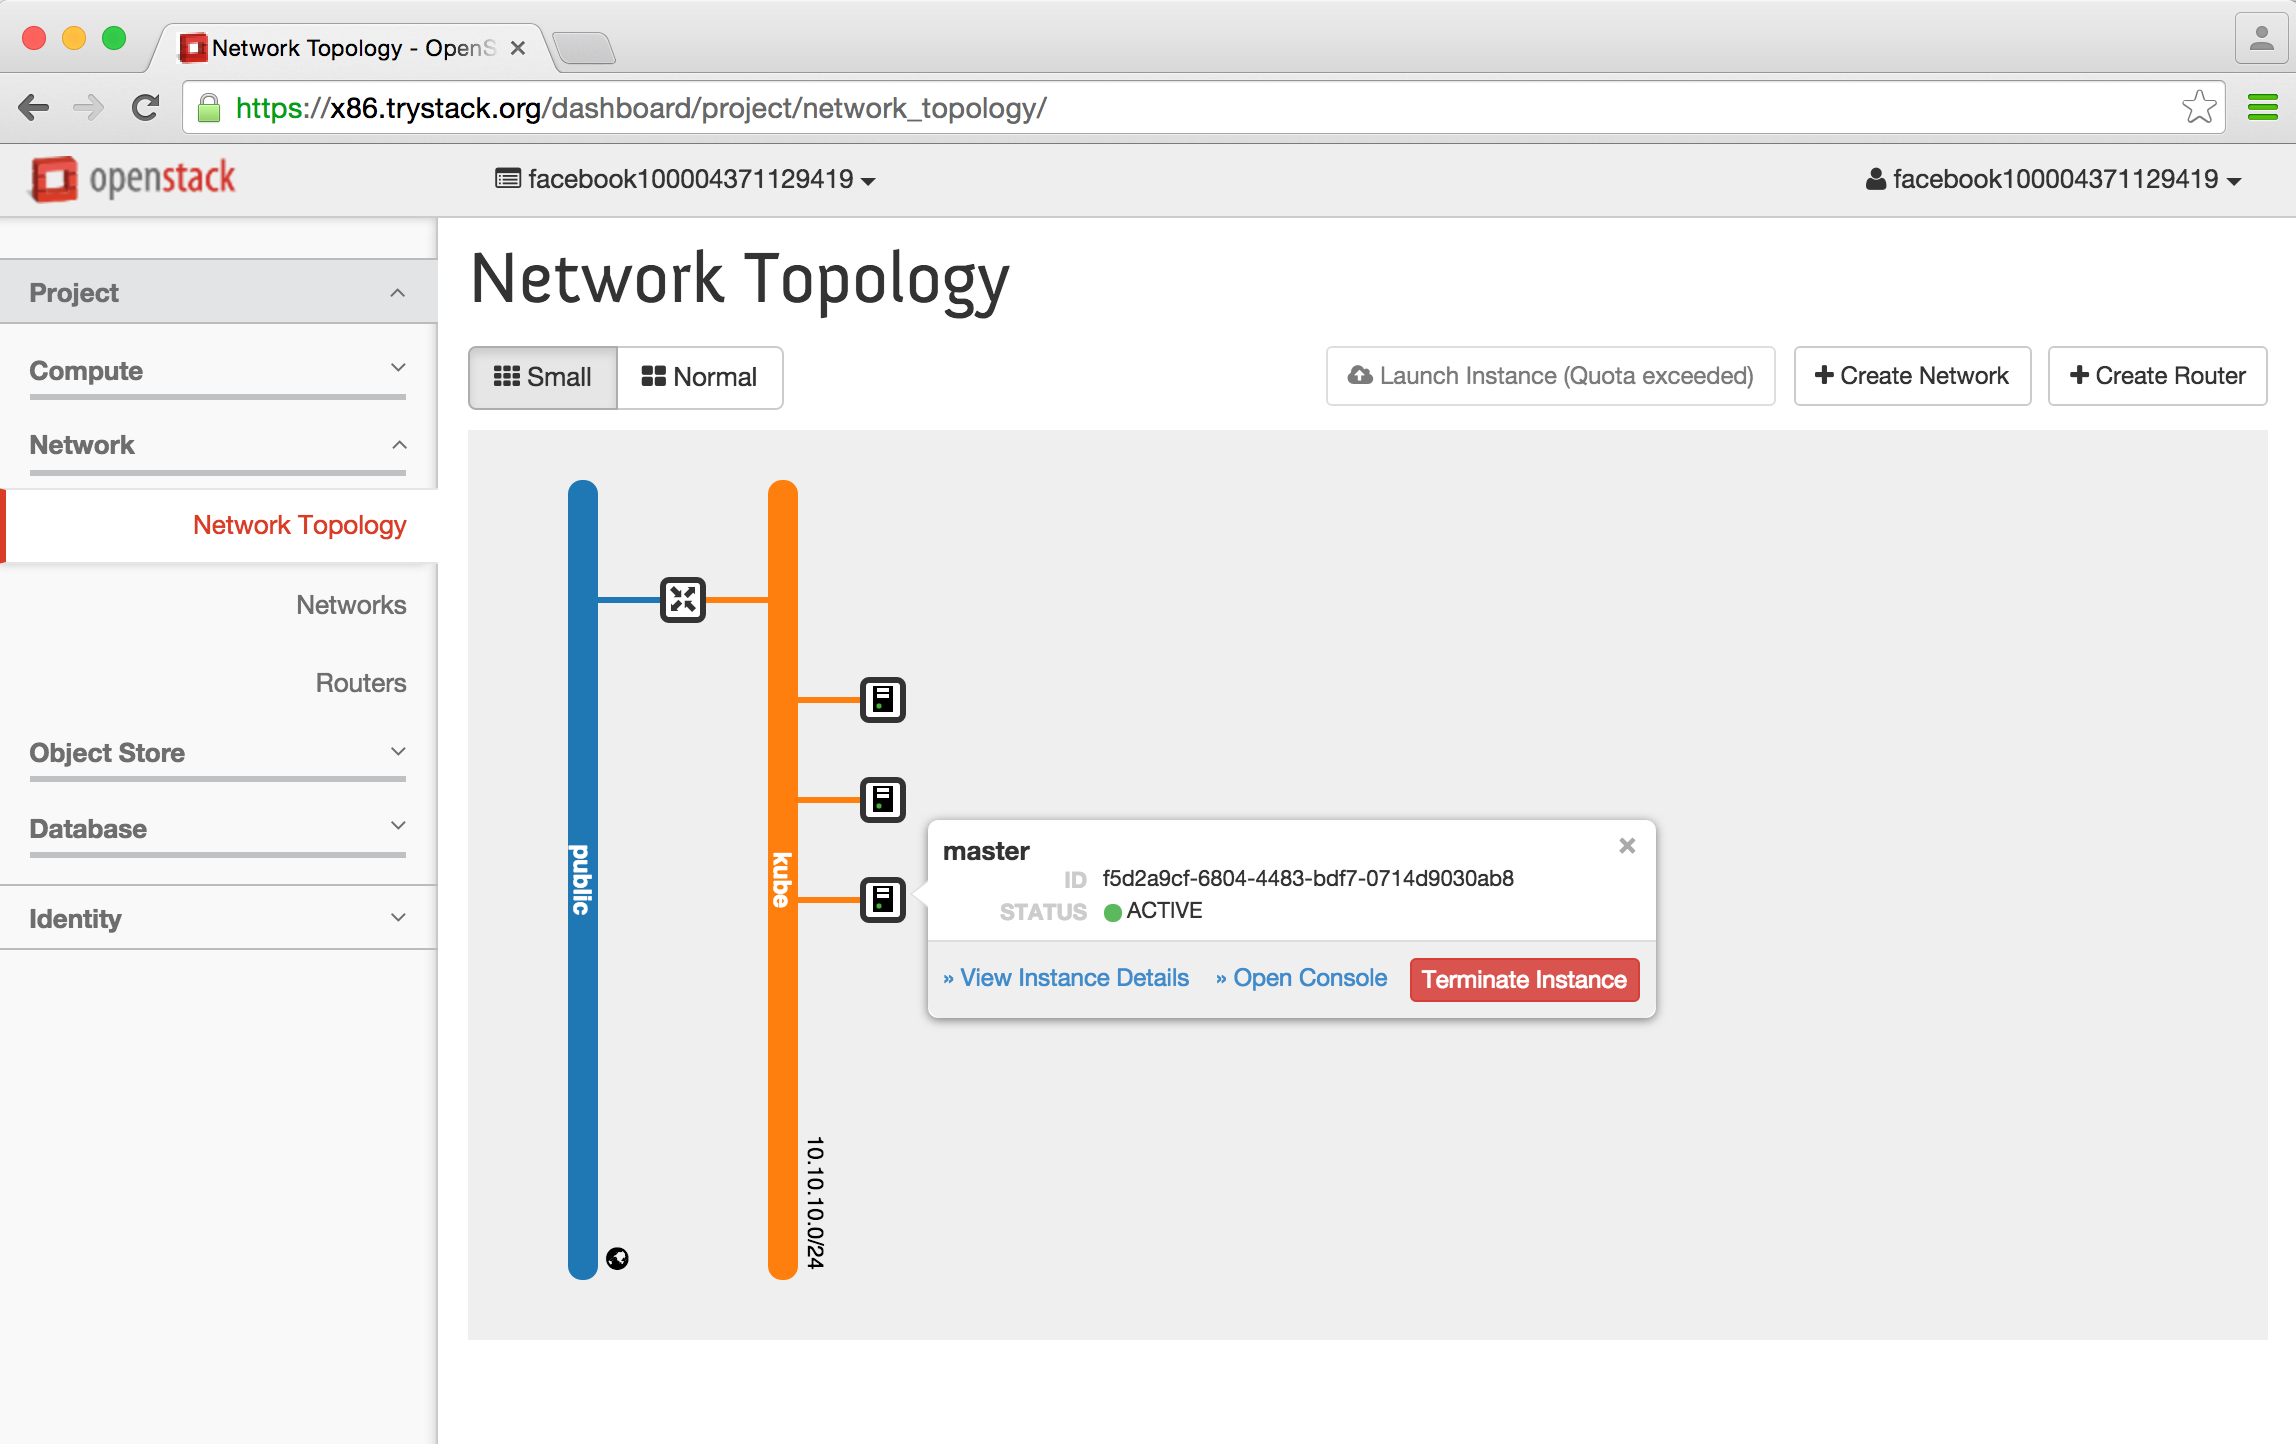
Under Network, click Network Topology then Create Network, give it a name and click next to create a subnet with some name and a Network Address 10.10.10.0/24, then enter 8.8.8.8 in the DNS Name Servers on the next screen.
Next, click Create Router, name it something you like and make sure “public” is selected as the External Network.
Back in Network Topology, hover over your router and click Add Interface, select your subnet and click the blue “Add Interface” button.
Your network topology should now look something like this (minus the instances)…
4- Create instances
We are limited to 3 instances in this sandbox which will keep the number of our nodes to one, but you can repeat adding more minions in your own environment as far as you like your cluster to grow.
Create master (Fedora)
From Images, click Launch Instance from your Fedora image, enter “master” for Image Name and select m1.small Flavor, make sure the Security Group you created above is checked in Access & Security. Also ensure your Network is selected then under Post-Creation, select “Direct Input” for Customization Script Source dropdown and paste this in Script Data:
#cloud-config
password: redhat123
ssh_pwauth: True
chpasswd: { expire: False }
Click Launch. Your instance will spawn momentarily; Once ready, click the drop down on its right and select Associate Floating IP and click the “+” button to add one. Once allocated, press Associate.
Create registry and minion1 (CentOS)
Repeat this twice for each instance: Go back to Images, Launch Instance from your CentOS image, call it “registry” or “minion1” and use the m1.medium flavor, ensure your Security Group is checked. Also ensure your Network is selected then under Post-Creation, select “Direct Input” for Customization Script Source dropdown and paste this in Script Data:
#cloud-config
password: redhat123
ssh_pwauth: True
chpasswd: { expire: False }
runcmd:
- sed -i'.orig' -e's/Defaults    requiretty/#Defaults    requiretty/' /etc/sudoers
- systemctl restart sshd
Click Launch.
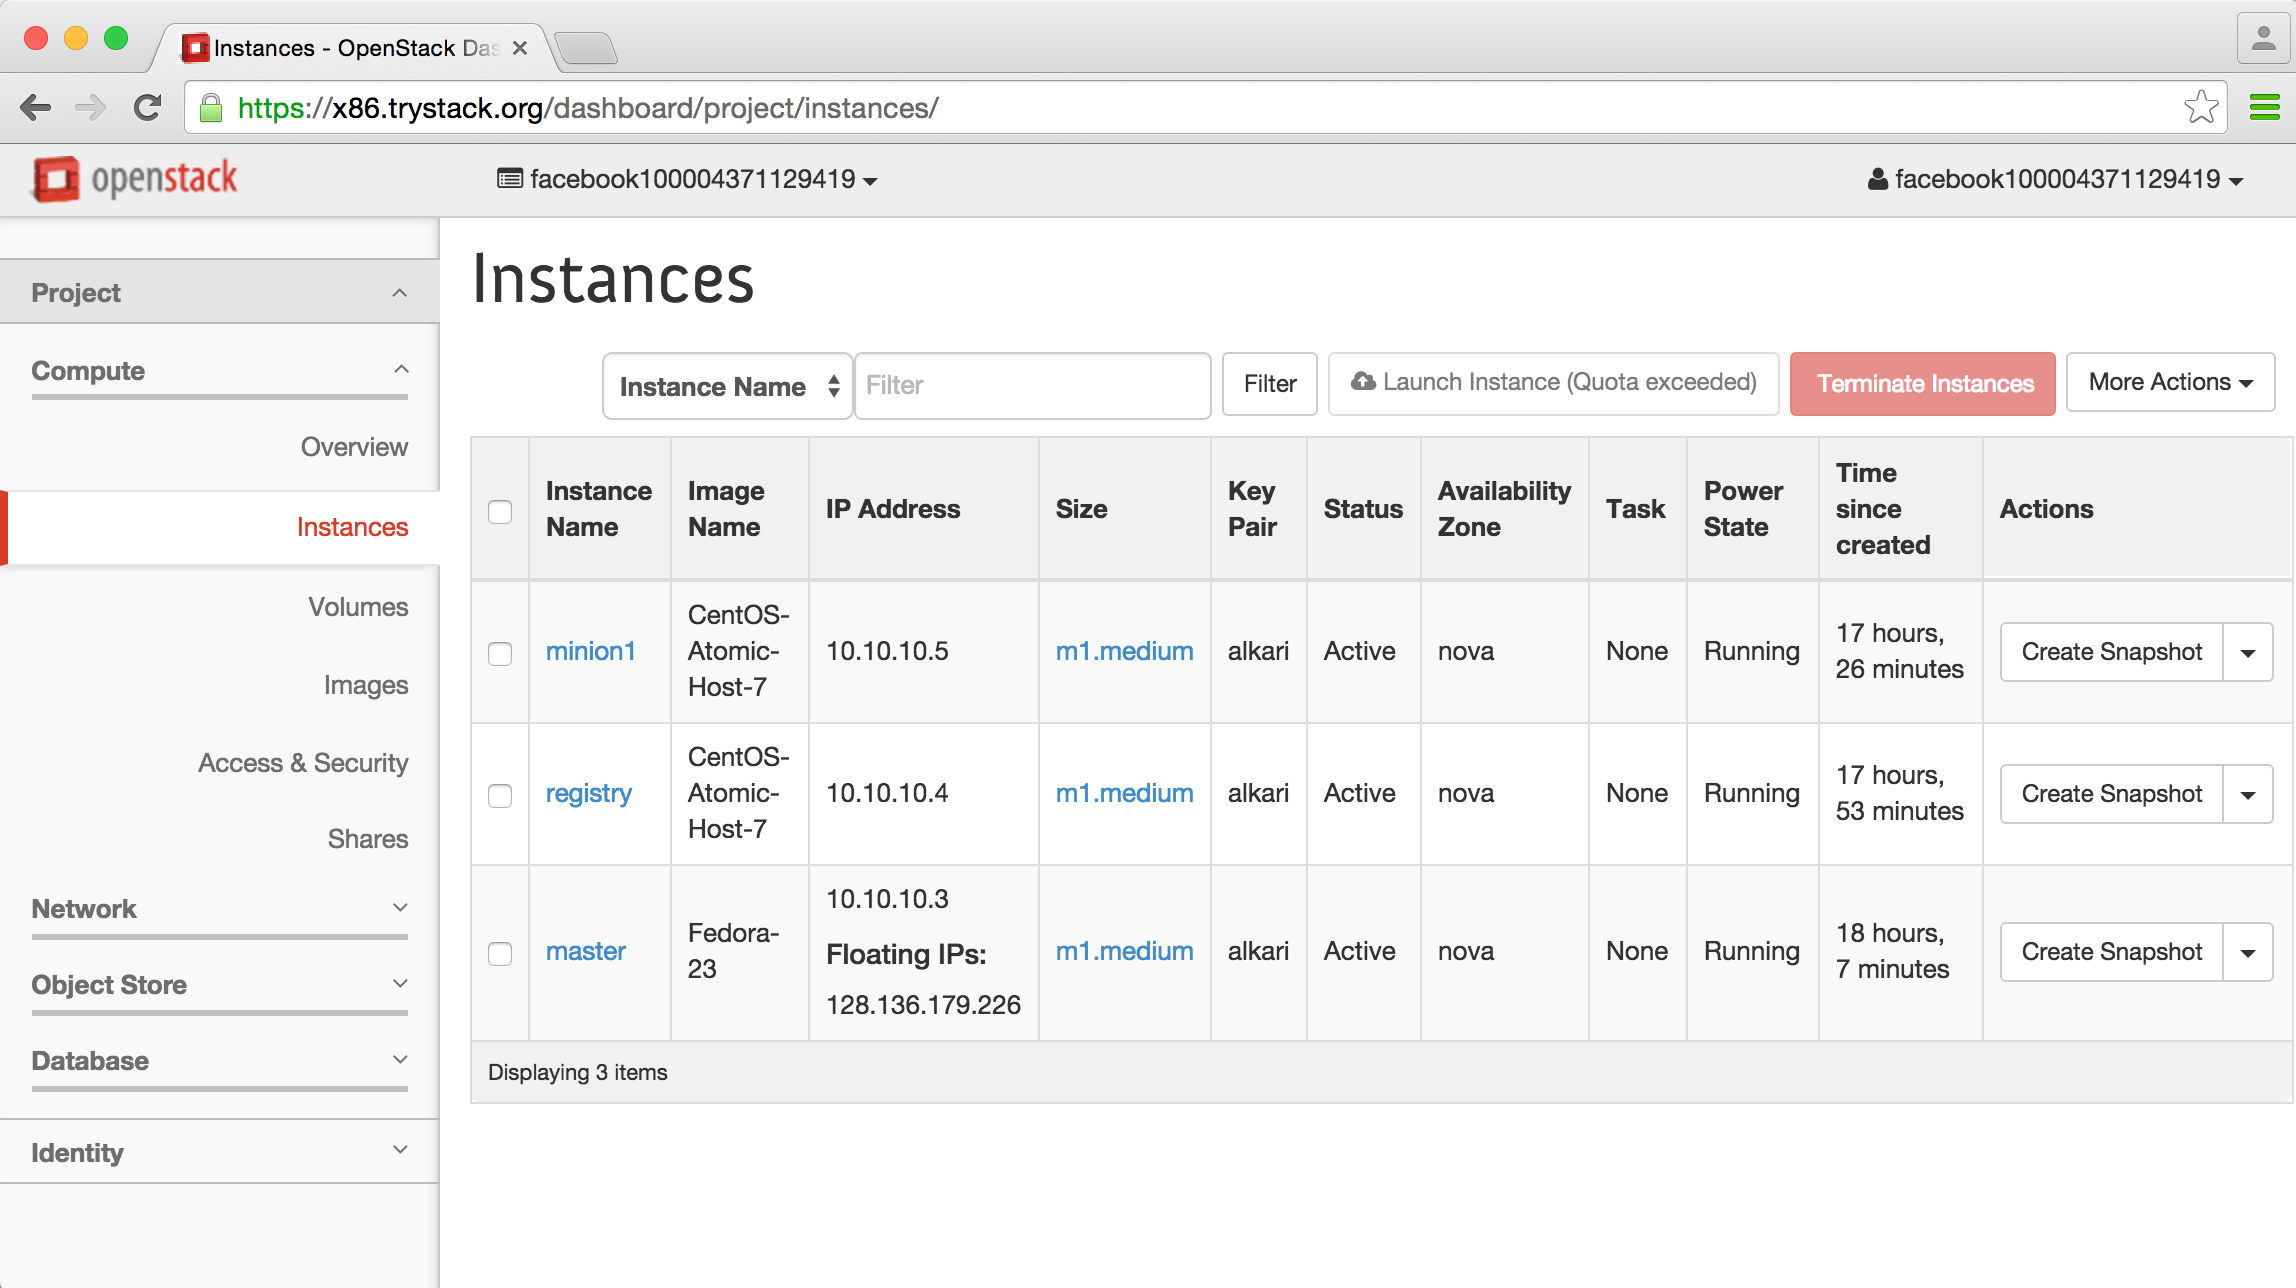
Your instances should now be all listed:
5- Configure your infrastructure
You can now login to your master’s public IP address from a terminal:
$ ssh fedora@128.136.179.166
First things first, let’s setup simple name resolution. If they’re different, replace IP addresses below with your own:
[fedora@master ~]$ cat <<EOF |sudo tee -a /etc/hosts
10.10.10.3 master.novalocal master
10.10.10.4 registry.novalocal registry
10.10.10.5 minion1.novalocal minion1
EOF

[fedora@master ~]$ cat /etc/hosts | ssh centos@registry "sudo sh -c 'cat >/etc/hosts'"

[fedora@master ~]$ cat /etc/hosts | ssh centos@minion1 "sudo sh -c 'cat >/etc/hosts'"
While we’re here, let’s update our nodes:
[fedora@master ~]$ ssh centos@registry "sudo atomic host upgrade && sudo reboot"
[fedora@master ~]$ ssh centos@minion1 "sudo atomic host upgrade && sudo reboot"
Now for this lab, set SELinux to permissive for the master node, update and reboot:
[fedora@master ~]$ sudo sed -i'.orig' \
-e "s/SELINUX=enforcing/SELINUX=permissive/g" /etc/selinux/config
[fedora@master ~]$ sudo dnf -y update
[fedora@master ~]$ sudo reboot
Wait a couple minutes for your instance to reboot then arrow up and reconnect:
$ ssh fedora@128.136.179.166
6- Install & configure components
Configure registry
Time to have some fun. First we will configure our local Docker Registry Cache. Let’s create a container:
[fedora@master ~]$ ssh centos@registry

[centos@registry ~]$ sudo docker create -p 5000:5000 \
-v /var/lib/local-registry:/srv/registry \
-e MIRROR_SOURCE=https://registry-1.docker.io \
-e MIRROR_SOURCE_INDEX=https://index.docker.io \
-e STANDALONE=false \
-e STORAGE_PATH=/srv/registry \
--restart=always --name=local-registry registry:2
Then create the local-registry.service for this container:
[centos@registry ~]$ cat <<EOF |sudo tee -a /etc/systemd/system/local-registry.service
[Unit]
Description=Local Docker Registry Cache
Requires=docker.service
After=docker.service
[Install]
WantedBy=multi-user.target
[Service]
ExecStart=/usr/bin/docker start -a %p
ExecStop=-/usr/bin/docker stop -t 2 %p
Restart=on-failure
RestartSec=10
EOF
and enable, start and set its SELinux context:
[centos@registry ~]$ sudo systemctl daemon-reload
[centos@registry ~]$ sudo systemctl enable local-registry
[centos@registry ~]$ sudo systemctl start local-registry
[centos@registry ~]$ sudo chcon -Rvt svirt_sandbox_file_t /var/lib/local-registry
[centos@registry ~]$ exit
Just like that, your local registry is all set. Time to configure our master.
Configure master
Install and start software components:
[fedora@master ~]$ sudo dnf install -y kubernetes docker etcd flannel cockpit cockpit-kubernetes
[fedora@master ~]$ sudo systemctl enable docker cockpit.socket
[fedora@master ~]$ sudo systemctl start docker cockpit.socket
Configure etcd:
For this single etcd server, we only need to listen for client connections on all IP addresses and enable and start the daemon:
[fedora@master ~]$ sudo sed -i'.orig' -e 's|http://localhost:2379|http://0.0.0.0:2379,http://0.0.0.0:4001|g' /etc/etcd/etcd.conf
Configure Kubernetes:
There are four configuration files to modify in /etc/kubernetes: config, apiserver, controller-manager and kubelet.
In the config file, we need to replace the localhost IP address with your master’s address (SWAP WITH YOUR OWN IF DIFFERENT) and add our etcd server address:
[fedora@master ~]$ sudo sed -i'.orig' -e 's/127.0.0.1/10.10.10.3/' /etc/kubernetes/config
[fedora@master ~]$ echo 'KUBE_ETCD_SERVERS="--etcd_servers=http://10.10.10.3:2379"' | sudo tee -a /etc/kubernetes/config
Next we’ll simplify and overwrite apiserver, the API configuration file:
[fedora@master ~]$ sudo mv /etc/kubernetes/apiserver /etc/kubernetes/apiserver.orig

[fedora@master ~]$ cat <<EOF |sudo tee -a /etc/kubernetes/apiserver
KUBE_API_ADDRESS="--address=0.0.0.0"
KUBE_ETCD_SERVERS="--etcd_servers=http://127.0.0.1:2379"
KUBE_SERVICE_ADDRESSES="--service-cluster-ip-range=10.254.0.0/16"
KUBE_ADMISSION_CONTROL="--admission_control=NamespaceLifecycle,NamespaceExists,LimitRanger,SecurityContextDeny,ResourceQuota"
KUBE_API_ARGS=""
EOF
Then, add your comma-separated list of minion(s)’ IP address(es) in the controller-manager file (We’ll be using our master as a second node in addition to our lonely minion here):
[fedora@master ~]$ echo 'KUBELET_ADDRESSES="--machines=10.10.10.3,10.10.10.5"' |sudo tee -a /etc/kubernetes/controller-manager
Finally, edit kubelet, your controller’s minion file:
[fedora@master ~]$ sudo sed -i'.orig' -e 's/--address=127.0.0.1/--address=0.0.0.0/' \
-e 's/--hostname_override=127.0.0.1/--hostname_override=master.novalocal/' \
-e 's/KUBELET_ARGS=""/KUBELET_ARGS="eth0"/' /etc/kubernetes/kubelet
Time to start Kubernetes:
[fedora@master ~]$ sudo systemctl enable etcd kube-apiserver kube-controller-manager kube-scheduler kubelet
[fedora@master ~]$ sudo systemctl start etcd kube-apiserver kube-controller-manager kube-scheduler kubelet
Configure Flannel:
Flanneld provides a vxlan tunneled network configuration via etcd. We’ll need to create a JSON file to provide the options for a /12 network to create a /24 subnet per node.
[fedora@master ~]$ cat >> ~/flanneld.json <<EOF
{
  "Network": "172.16.0.0/12",
  "SubnetLen": 24,
  "Backend": {
    "Type": "vxlan"
  }
}
EOF
Then we’ll use curl to push the data into etcd:
[fedora@master ~]$ curl -L http://localhost:2379/v2/keys/atomic-key/network/config -XPUT --data-urlencode value@flanneld.json
And to test etcd key and display a nicely-formatted output in JSON:
[fedora@master ~]$ sudo dnf install -y jq
[fedora@master ~]$ curl -L http://localhost:2379/v2/keys/atomic-key/network/config |jq .
Configure Atomic nodes (minion(s))
You are almost there. We have just one minion to configure here but the process is pretty much the same for as many you might want to add.
Let’s login to our node:
[fedora@master ~]$ ssh centos@minion1
First, we’ll tell Docker where to find our registry mirror:
[centos@minion1 ~]$ sudo sed -i'.orig' -e "s|OPTIONS='|OPTIONS='--registry-mirror=http://master.novalocal:5000 |" /etc/sysconfig/docker
Next, configure Docker to use the overlay network by configuring the local flannel service with the etcd server and key we created above:
[centos@minion1 ~]$ sudo sed -i'.orig' -e 's/127.0.0.1/master.novalocal/' -e 's/coreos.com/atomic-key/' -e 's/#FLANNEL_OPTIONS=""/FLANNEL_OPTIONS="eth0"/' /etc/sysconfig/flanneld
Now let’s configure Kubernetes; Replace the localhost IP address to point this minion to its master’s address (SWAP WITH YOUR OWN IF DIFFERENT)
[centos@minion1 ~]$ sudo sed -i'.orig' -e 's/127.0.0.1/10.10.10.3/' /etc/kubernetes/config
Then, configure the minion’s kubelet file. The address entry here must match the entry in KUBELET_ADDRESSES on master.
[centos@minion1 ~]$ sudo sed -i'.orig' \
-e 's|--address=127.0.0.1|--address=10.10.10.5|' \
-e 's|--hostname_override=127.0.0.1|--hostname_override=minion1.novalocal|' \
-e 's|--api_servers=http://127.0.0.1|--api_servers=http://master.novalocal|' \
-e 's|KUBELET_ARGS=""|KUBELET_ARGS="eth0"|' /etc/kubernetes/kubelet
And finally, enable Flannel and Kubernetes services and reboot
[centos@minion1 ~]$ sudo systemctl enable flanneld kube-proxy kubelet
[centos@minion1 ~]$ sudo reboot
In a minute or two, validate your node is now in the cluster:
[fedora@master ~]$ kubectl get nodes
NAME                LABELS                                     STATUS
master.novalocal    kubernetes.io/hostname=master.novalocal    Ready
minion1.novalocal   kubernetes.io/hostname=minion1.novalocal   Ready
You have done it! Pat yourself on the back and grab some coffee.
Time to Play
Use Cockpit
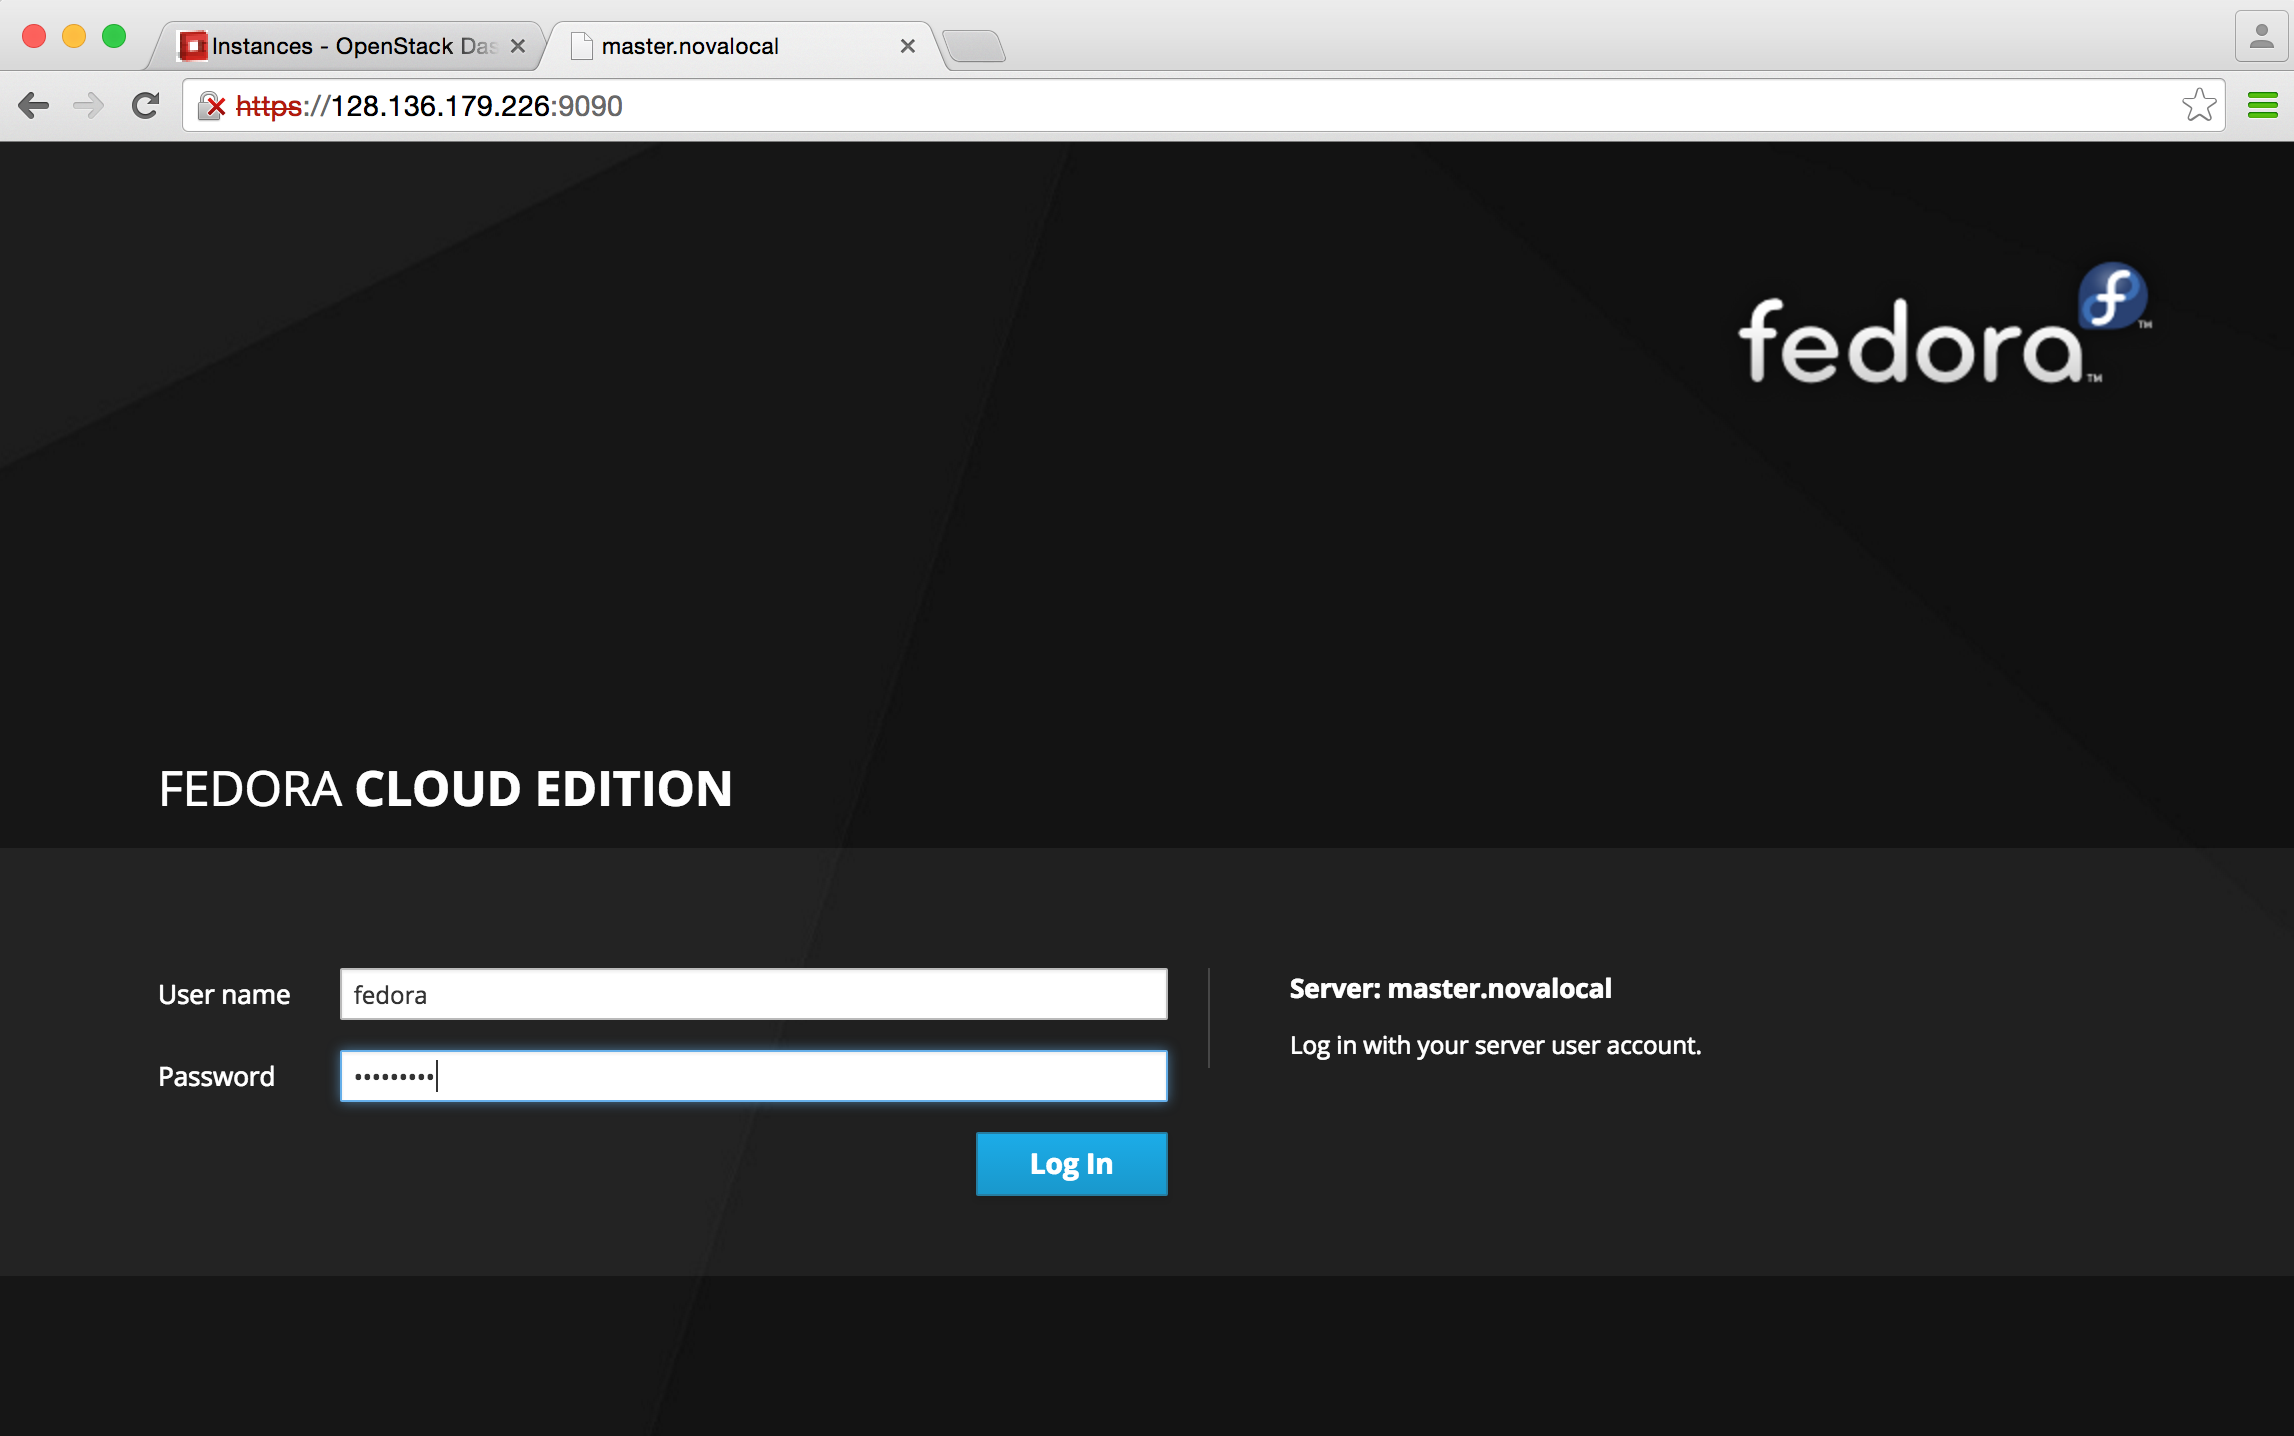
In a new browser window, login with fedora:redhat123 to your Cockpit interface:
https://128.136.179.226:9090
Launch a Simple Application
For this example, we’ll be launching a popular web server, nginx, from a pre-built container image. The kubectl run command below will create two nginx replicas, listening on port 80.
[fedora@master ~]$ kubectl run atomic-nginx --image=nginx --replicas=2 --port=80
CONTROLLER     CONTAINER(S)   IMAGE(S)   SELECTOR           REPLICAS
atomic-nginx   atomic-nginx   nginx      run=atomic-nginx   2
Then expose your load-balanced application
[fedora@master ~]$ kubectl expose rc atomic-nginx --port=80 --type=LoadBalancer
NAME           LABELS             SELECTOR           IP(S)     PORT(S)
atomic-nginx   run=atomic-nginx   run=atomic-nginx             80/TCP
To find your cluster IP address, run:
[fedora@master ~]$ kubectl get svc atomic-nginx
NAME           LABELS             SELECTOR           IP(S)            PORT(S)
atomic-nginx   run=atomic-nginx   run=atomic-nginx   10.254.253.177   80/TCP
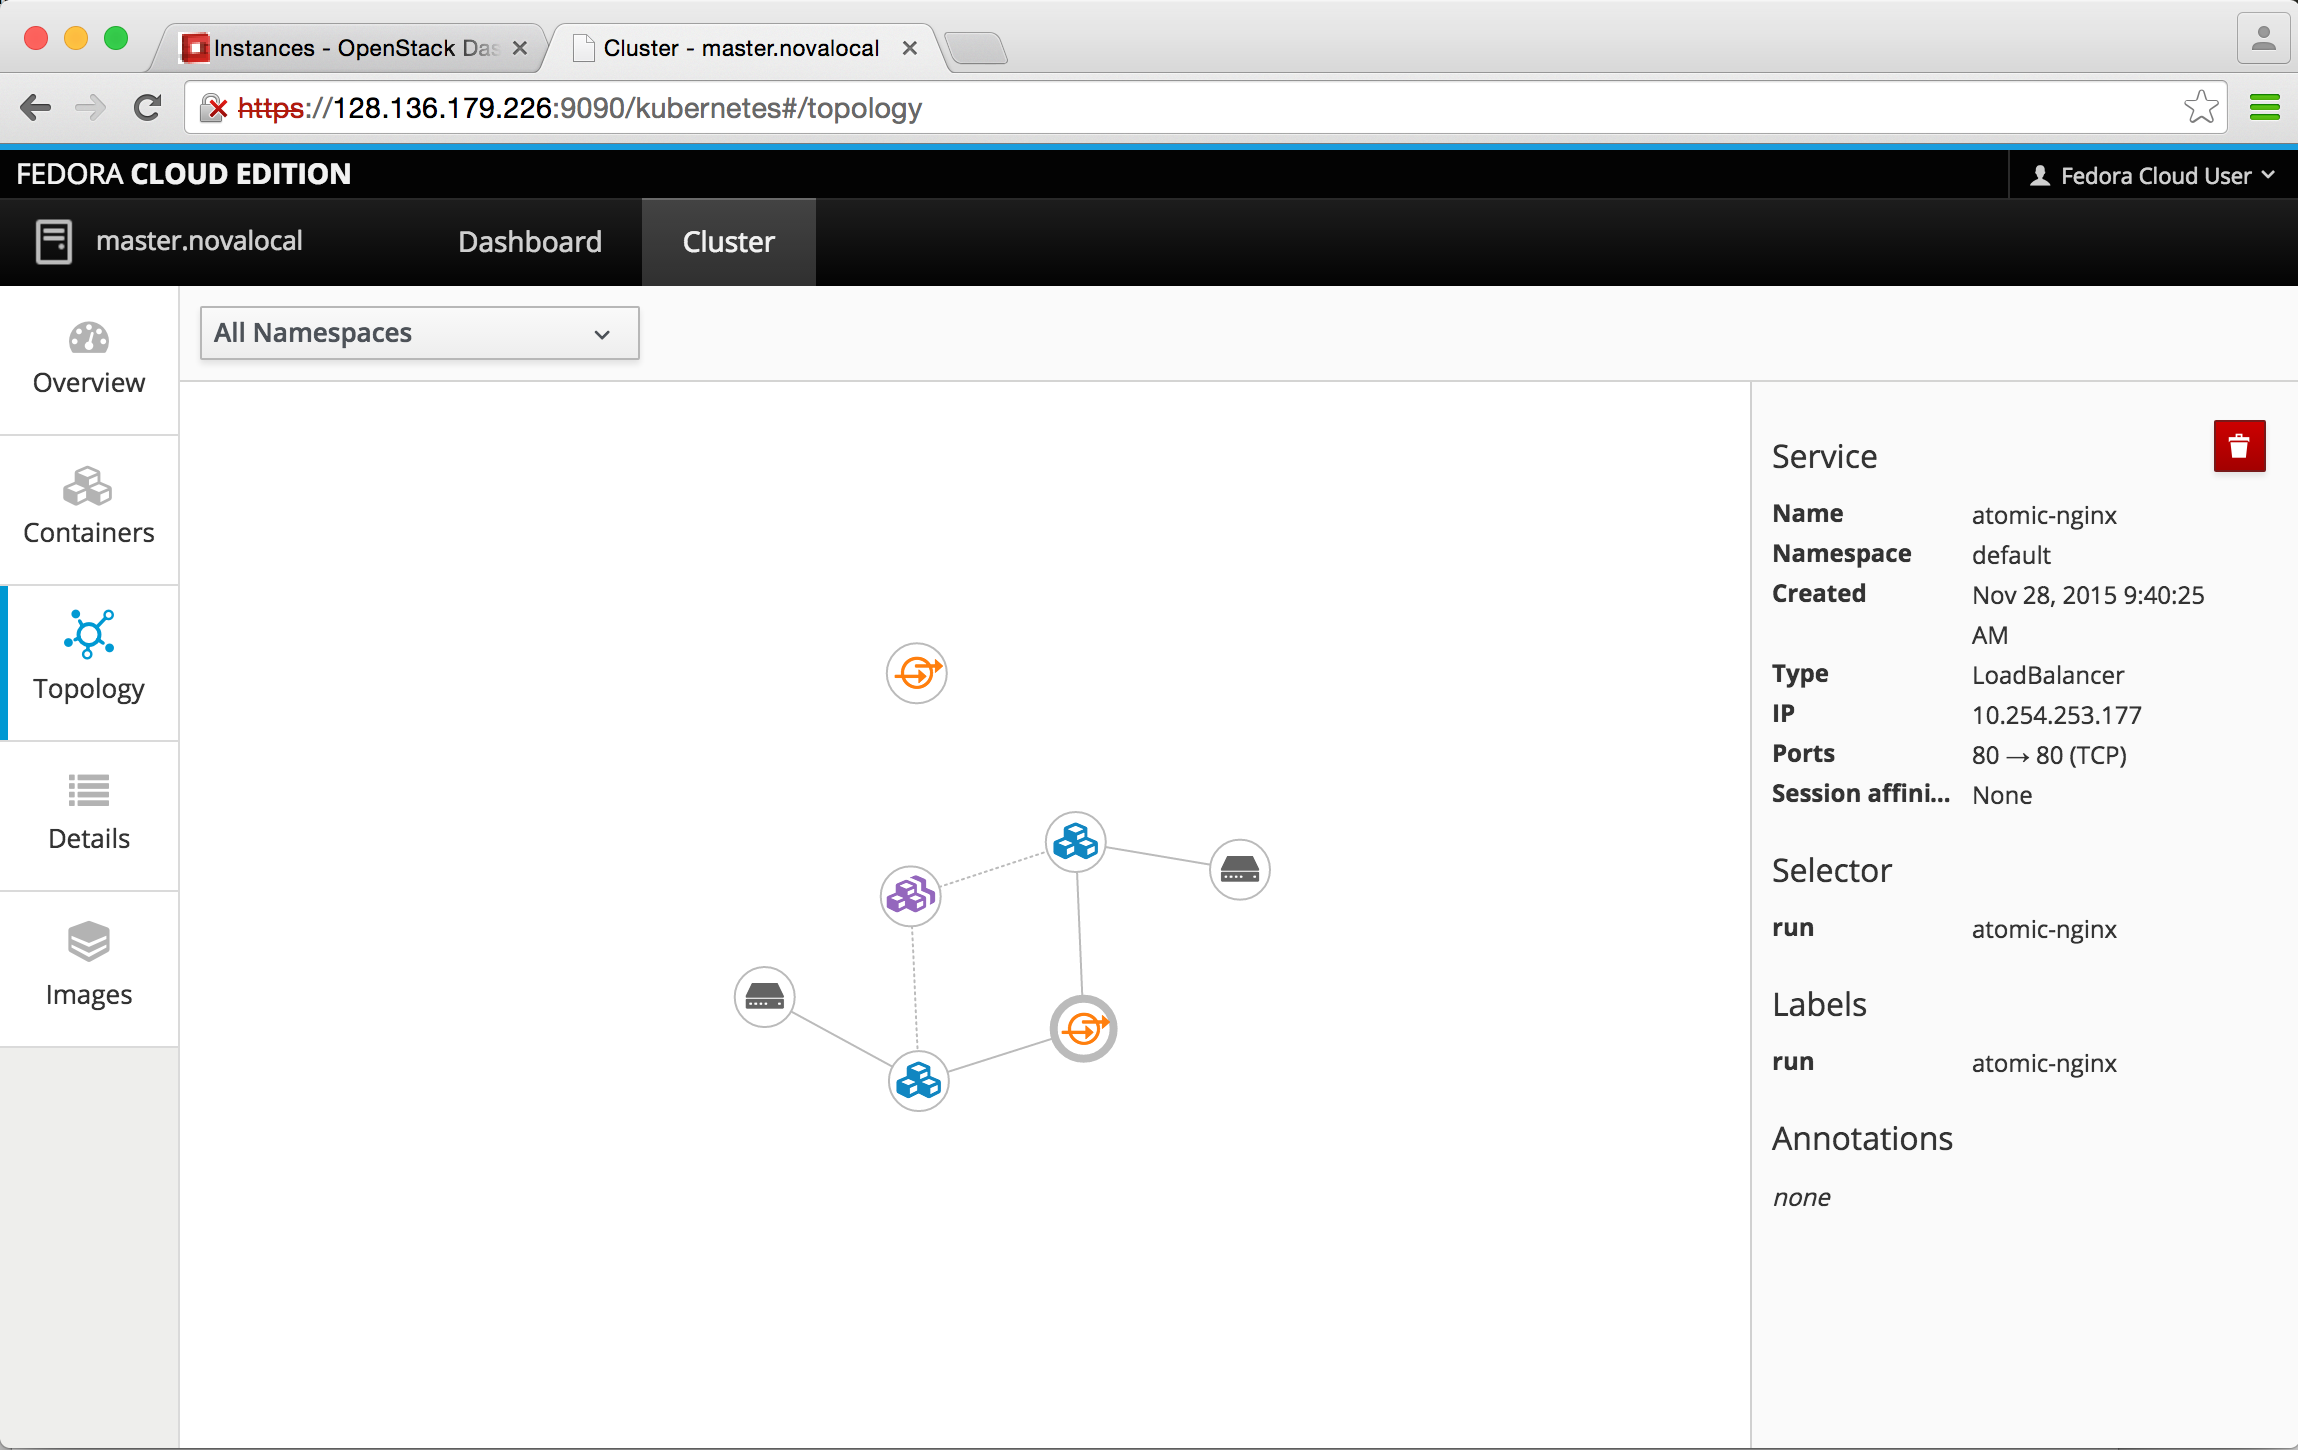
To explore Cockpit, click Cluster, then take a look at your new application in Topology
Once you’re done looking around and testing stuff, kill your application:
[fedora@master ~]$ kubectl delete rc atomic-nginx
replicationcontrollers/atomic-nginx
[fedora@master ~]$ kubectl delete svc atomic-nginx
services/atomic-nginx
Congratulations, you have completed this lab deployment. You can now scale this onto your own OpenStack infrastructure and take advantage of Atomic to build more complex applications.
REMEMBER: IF YOU USED TRYSTACK.ORG, YOUR WORK WILL BE DESTROYED IN 24 HOURS.
Now What?
Detailed information on Atomic are available at http://www.projectatomic.io/docs/gettingstarted/
The Kubernetes user guide offers several walkthroughs to test more sophisticated scenarios at http://kubernetes.io/v1.1/docs/user-guide/
You can reach me on freenode or Twitter @alkari. Hope this was helpful.